






FIX your slice
Coaching lesson

SWINGMATE · SWING TRAINING
Most alignment rod holders are built for one stick and one drill. SwingMate was built to keep changing. Set a simple reference, move the hinge, change the angle, add another rod, reverse the path and rebuild the same station around whatever your swing needs next.
Use it to train swing plane, club path, backswing and downswing hand path, delivery space, rotation, sequencing and post-impact exit. Then reconfigure it for pitching, chipping or putting. The hardware stays useful as your swing changes.
Easy to start. Hard to outgrow. Buy the hardware once and keep changing the drill.

SwingMate started with a simple idea: if a coach tells you to swing under a plane, move your hands through a different space or rotate to a checkpoint, why should you have to remember where that reference was once you are practising alone?
The adjustable rods give the instruction a physical location in space. Use a rod as a boundary, a gate, a target or a checkpoint. Start with one reference, make slow rehearsals, then build speed as the movement becomes more familiar.
Use it at the range, in a simulator or at home where you have enough clearance. Even a short practice session can begin from the same reference you used last time.
Coaching lesson
Coaching lesson
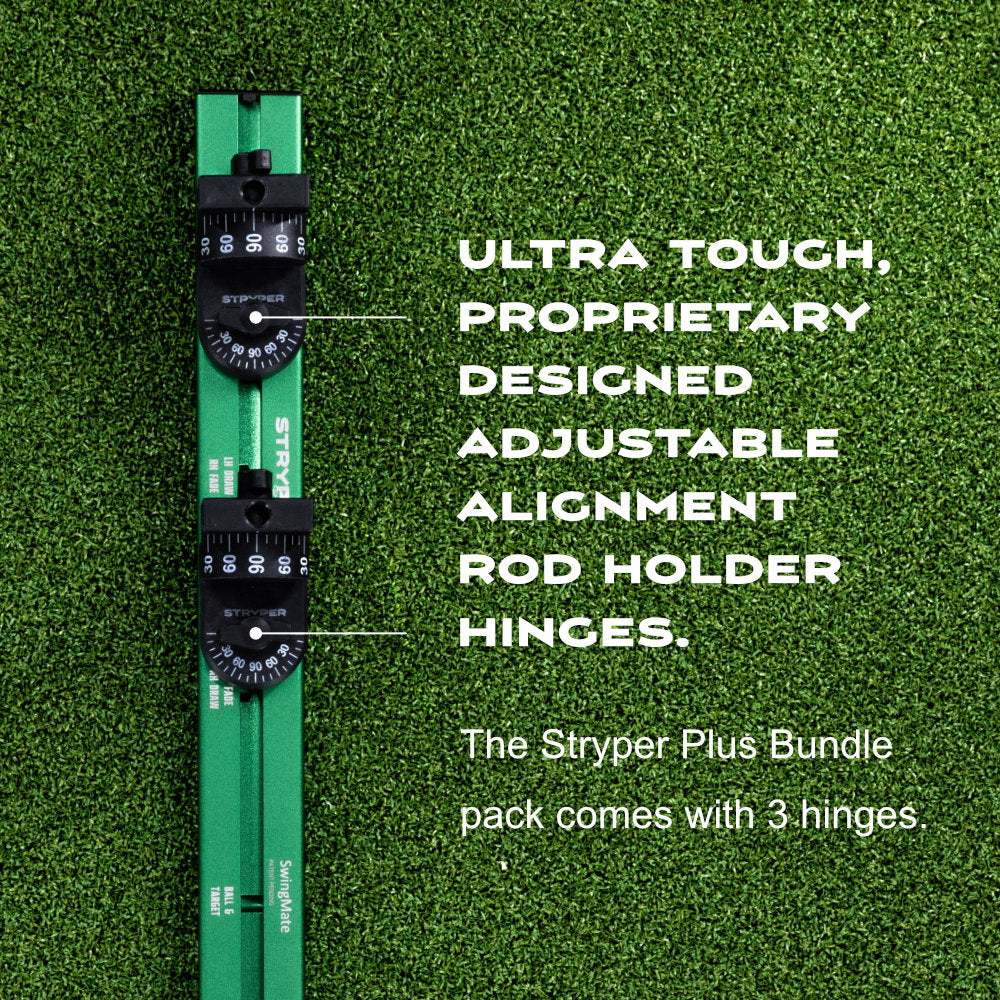
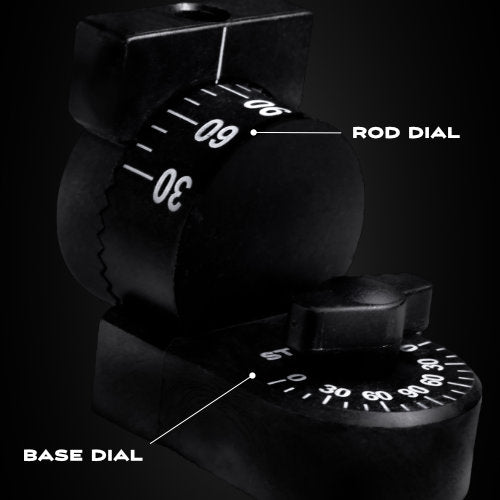
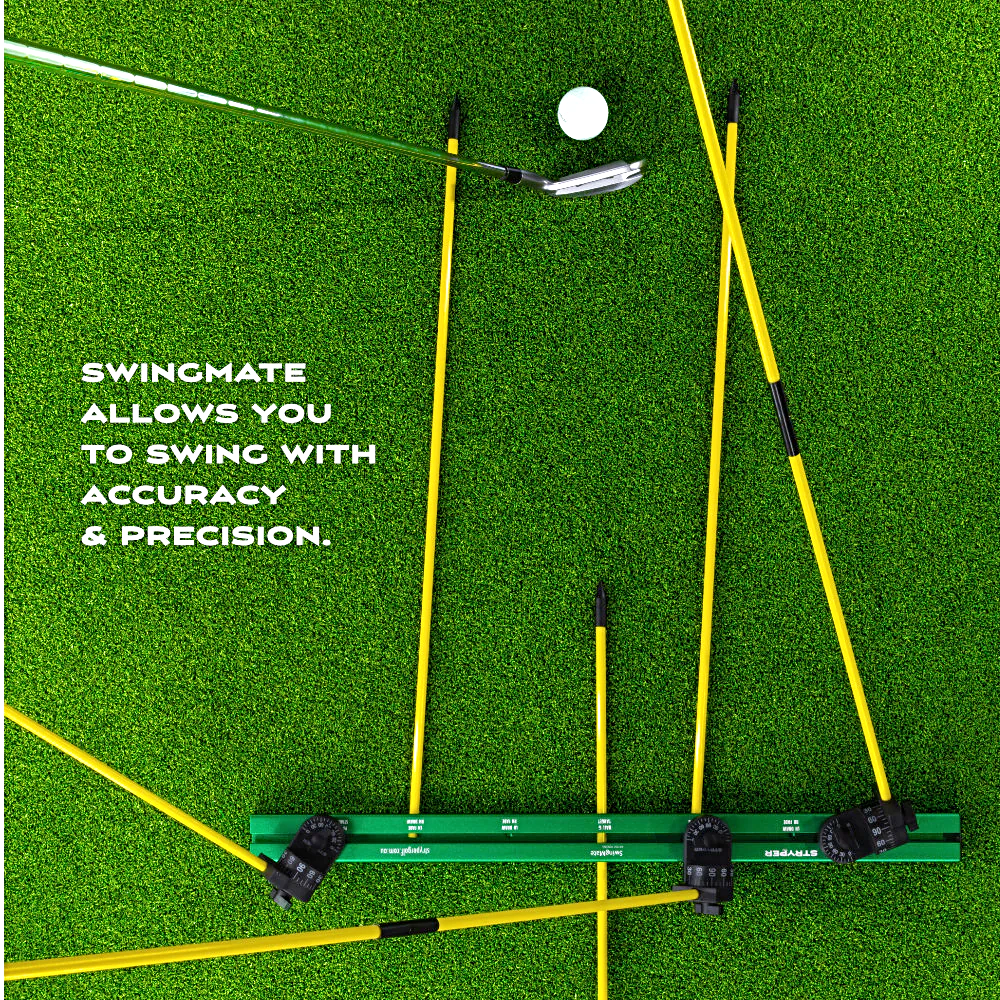
SwingMate's proprietary ratchet hinges slide along the base, rotate around the base connection and set the rod inclination in indexed increments. That gives you control over where a reference starts, which direction it points and how steep or shallow it sits.
The hinges are intentionally firm so they can support the long rods. If they are difficult to move by hand, use an alignment rod as a lever as shown in the instructions.
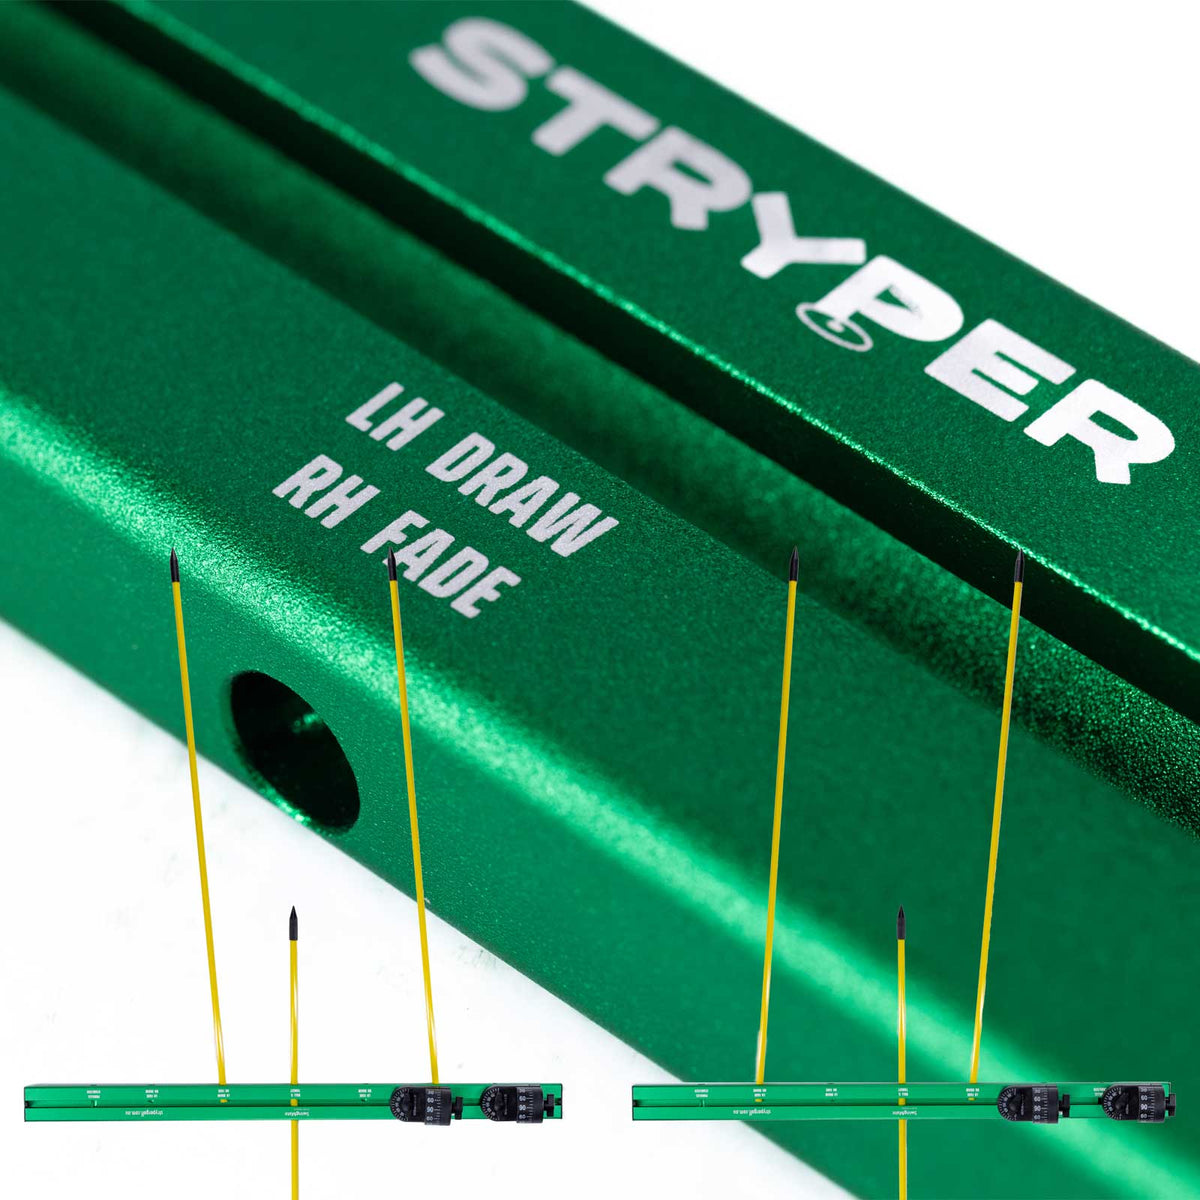
The anodised aluminium base uses a T-slot profile so the hinges can move closer to or farther from the golfer as well as rotate in different directions. The centre rod establishes the ball and target reference, while the labelled ground-rod positions provide visible draw and fade path tendencies.
The raised rods do not have only one job. A rod can be a boundary you avoid, a gate you swing through, a target you move towards, a diagnostic marker or a body checkpoint.
The hand-path position can be used as a ceiling or space boundary for the hands and handle. That is useful for more than 'low hands': if the pelvis moves toward the ball and the torso stands up through impact, the hands/handle often rise or move out. The rod does not diagnose every cause of early extension, but it gives that loss of delivery space a physical reference.
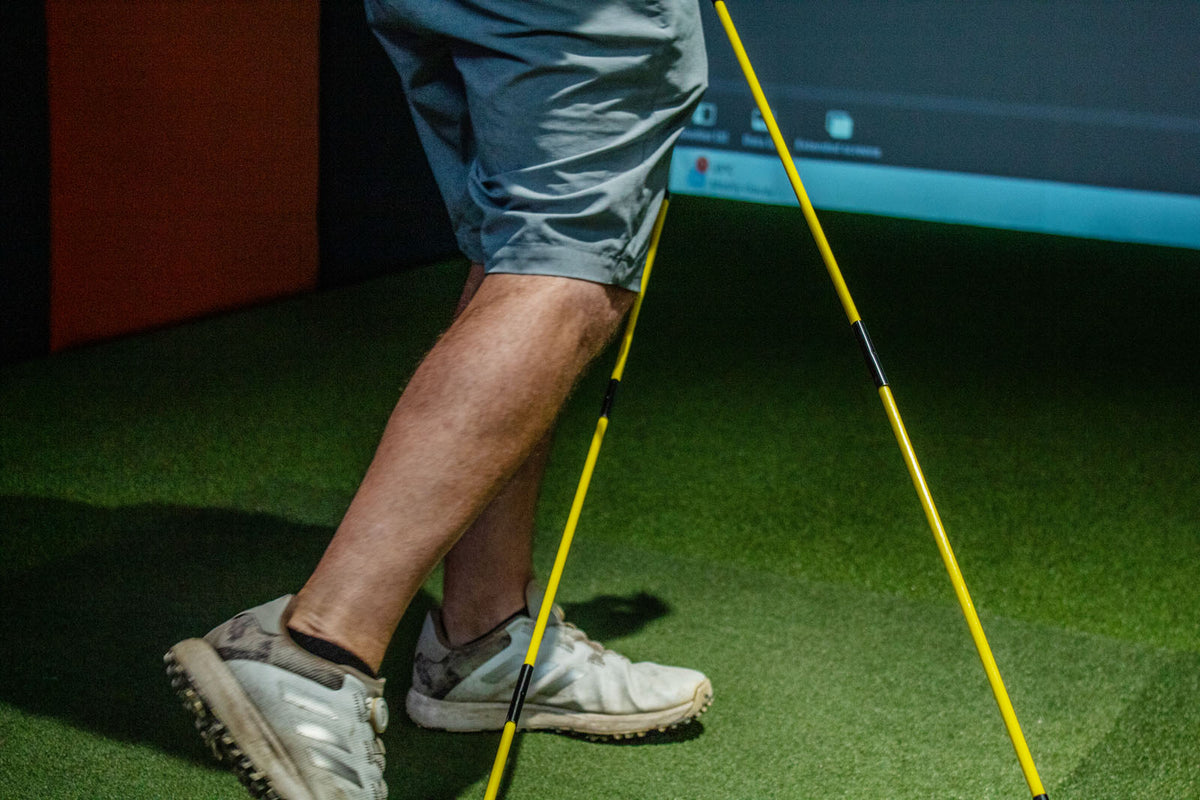
The standard Rotation Drill uses the rear hinge as a knee/body checkpoint: lead knee toward the rod in the backswing, trail knee toward it in the follow-through. A longer 1.6 m rod can also be fitted in that position so its upper section reaches into the club-exit corridor. Rehearsed slowly, that can create an avoid-the-rod boundary for an upper-body spin-out, shoulders opening too early, an over-the-top/cut-across delivery or a club that exits left prematurely.
That is what separates SwingMate from a fixed alignment-stick holder. Start with one simple reference, then reposition or add references as the club, fault or coaching instruction changes. Easy to start. Hard to outgrow.
The idea for Stryper products started when we got frustrated we couldn’t do our favourite alignment stick drills on the indoor range, or the artificial tee box on the outdoor range. Of course, you can use it outdoors as well.
Most other alignment rod holders don’t allow angle AND rotation of rods, AND also able to have them set up accurately in relation to other rods. The hinges are adjustable for vertical angle of your alignment rods and also spin on the horizontal axis. You can also slide them on the base for precise fine-tuning.
Based on our own proprietary hinge design, you can quickly change the vertical angle of the alignment sticks to suit swing plane, hand height or many other drills. And we have the angles printed right there on the hinge so you know exactly where you are at all times. Leave them set up, or write down what the best angles are for your drills.
Each base comes with three hinges. You can use one at a time or all three, leaving them set up where the angles are best for you. The types of drills you can achieve are almost limitless.
There’s no problems with SwingMate or StanceMate blocking the view of your ball when using Trackman or other launch monitors or simulators.
BUILT TO LAST
SwingMate is not just a set of alignment rods. The base, hinges, markings and bag are the hardware that make the reference positions repeatable.

The base is built from anodised aluminium with permanent reference markings, giving the adjustable hardware a rigid platform you can return to again and again.

The spring-loaded hinges are intentionally firm enough to support the long rods while allowing repeatable angle, rotation and sliding adjustments.

The full SwingMate kit packs into a zippered bag with handles and a shoulder strap, ready to move between home, the range and a simulator bay.
The current SwingMate package includes the base, three adjustable hinges, the full set of path and upright rods, and the carry bag.

You do not need to build an elaborate station every time you practise. Start with the one reference that matches the movement you are trying to change. Once that reference is useful and repeatable, add another only if it helps the same task.
The Stryper Drills Library shows practical starting setups for plane and path, hand/handle space, rotation and body sequencing, early-extension/loss-of-posture patterns, stalled rotation, stuck delivery and common ball-flight patterns.
The same rod may do a different job when you move it. The hand-path rod can be a ceiling for hands/handle or an outer wall against getting trapped too far inside. The rotation rod can be a knee/body checkpoint, and with a 1.6 m rod fitted it can extend upward into the club-exit corridor as a boundary against cutting left too early.
That is why SwingMate can stay useful as your golf changes: the drill can change without replacing the training aid.
Begin with the rods well clear of your normal swing and use slow rehearsal swings first. Move a reference closer only when you are comfortable with the drill and understand where the rod sits relative to you.
The rods are visual guides. You do not need to strike them or make a full-speed swing close to them for the reference to be useful.
When the movement is comfortable, build speed gradually. If contact or ball flight becomes erratic, slow down and return to the reference rather than forcing the next swing.
SwingMate can provide a visible ground-path reference for both draw and fade practice.
Ball flight also depends on clubface angle, strike and other factors, so the path reference is only one part of the shot.
For a full explanation and drills, see our Training Resources.
SwingMate can be used indoors or outdoors, including simulator bays, garages, mats and synthetic turf, provided there is enough clearance for the rods and the golfer's swing.
The same physical references can be used alongside launch-monitor or simulator feedback so the golfer has something visible and repeatable to rehearse between shots.

STRYPER GOLF REVIEWS
Customer, coach and reviewer feedback on Stryper’s swing plane trainer, stance setup aid and complete setup-and-swing practice system.
Yes. SwingMate is a standalone product. StanceMate can be added when you also want repeatable stance-width and ball-position references, but it is not required for SwingMate to work.
Yes. SwingMate is designed for left-handed golfers as well as right-handed golfers.
Yes. Basic printed instructions are supplied, with more detailed online instructions and video drills available through Stryper.
No. The rods are visual references. Start with plenty of clearance and slow rehearsal swings, then move the references closer only when you are comfortable with the drill.
If you are coming over the top, getting steep or cutting across the ball, set a more draw-biased ground-path visual and use the raised rods to create a clearer corridor for the hands and club. The old out-to-in move now has a visible boundary and the in-to-out delivery you are chasing has a picture you can actually rehearse.
This is one of the core reasons SwingMate exists: make the movement you want easier to see and the old movement harder to repeat.
The same trainer can be configured in the opposite direction. If your backswing is too flat, the club is getting stuck too far inside or your path has become excessively in-to-out, move the references. Create a more fade-biased path, give the club a more upright plane reference and train the hands and club to work with the turning body instead of running away behind it.
The golfer changes. SwingMate changes with them.
Swing plane is three-dimensional. SwingMate gives you an inclined physical reference for where the club is travelling around your body. Raise it, lower it, rotate it and reposition it until the reference suits the movement you are training.
That makes it useful whether you are trying to shallow a steep move or stop a swing becoming excessively flat.
Put the reference where your body can interact with it. A knee, thigh or hip checkpoint immediately tells you whether your body has reached the position you are rehearsing.
Use the standard rotation position as a body-turn checkpoint, move it when the problem is excessive lateral sway or slide, or extend the reference when poor sequencing is causing the upper body and arms to race left too early.
Where your hands travel matters before, through and after impact. SwingMate can create a backswing hand-route reference, a downswing hand-plane corridor, an impact-space boundary for the hands and handle, and a reference for how the club and hands exit after the strike.
For a draw-biased swing, the club works to the right/in-to-out through impact and then naturally comes back around and exits left. Sequencing is paramount. The aim is not to stop the normal later leftward exit; it is to train the difference between a good sequence and cutting left too early with the arms or upper body.
Swing plane is the three-dimensional angle and shape of the club moving around your body. Club path describes the direction the clubhead is travelling through impact.
They influence each other, but they are not the same thing.
Use an inclined rod to create a swing-plane reference. Use the ground rods to make an in-to-out or out-to-in path visible. Add another rod for hand path, delivery space or body movement when that is the part you are changing.
Golfers can spend years compensating for one poor movement with another. The hands get overactive because the club is stuck. The body stalls because the golfer is trying to save the shot. Timing becomes critical because several moving parts are fighting each other.
Start getting the major geometry right and a surprising amount of that complexity can begin to disappear: better swing plane, better path, better hand delivery, better rotation and sequencing, a clearer low point and angle of attack, and more predictable contact.
That is the value of seeing and repeating the fundamentals instead of chasing the symptom of the week.
One product. Different clubs. Different movements. Different stages of your golf.